

Hey there! As a supplier of 45mm Standard Tubular Motors, I often get asked about how to connect these motors to a power supply. It might seem a bit tricky at first, but with the right guidance, it's actually a pretty straightforward process. In this blog post, I'll walk you through the steps of connecting a 45mm Standard Tubular Motor to a power supply, and also share some tips to make sure everything goes smoothly.
Understanding the 45mm Standard Tubular Motor
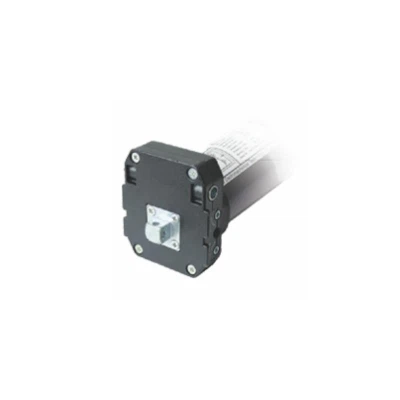
Before we dive into the connection process, let's take a quick look at what a 45mm Standard Tubular Motor is. These motors are commonly used in various applications, such as roller blinds, awnings, and garage doors. They are designed to provide reliable and efficient operation, and come in different power ratings and features to suit different needs.
One of the key advantages of a 45mm Standard Tubular Motor is its compact size. The 45mm diameter makes it easy to install in tight spaces, without sacrificing performance. Additionally, these motors are often equipped with advanced features like overload protection, thermal protection, and quiet operation, making them a popular choice for both residential and commercial applications.
Tools and Materials You'll Need
Before you start connecting your 45mm Standard Tubular Motor to a power supply, you'll need to gather a few tools and materials. Here's a list of what you'll need:
- 45mm Standard Tubular Motor: Of course, you'll need the motor itself. Make sure you have the correct model and specifications for your application.
- Power Supply: You'll need a power supply that is compatible with the motor's voltage and current requirements. Most 45mm Standard Tubular Motors operate on either 220V or 110V AC power, but some models may require DC power. Check the motor's datasheet or user manual for the exact power requirements.
- Wiring: You'll need to use the appropriate wiring to connect the motor to the power supply. Make sure the wiring is rated for the voltage and current of the motor, and is long enough to reach from the motor to the power supply.
- Screwdriver: You'll need a screwdriver to loosen and tighten the screws on the motor's terminal block.
- Electrical Tape: You'll need electrical tape to insulate the wiring connections and prevent short circuits.
- Multimeter: A multimeter is a useful tool for testing the voltage and continuity of the wiring connections. It's not essential, but it can help you troubleshoot any issues that may arise during the connection process.
Step-by-Step Guide to Connecting the Motor
Now that you have all the tools and materials you need, let's get started with the connection process. Here's a step-by-step guide to connecting a 45mm Standard Tubular Motor to a power supply:
Step 1: Turn Off the Power
Before you start working on the motor or the power supply, make sure you turn off the power to the circuit. This will help prevent any electrical shocks or short circuits. You can do this by switching off the circuit breaker or unplugging the power supply.
Step 2: Locate the Motor's Terminal Block
The terminal block is where you'll connect the wiring to the motor. It's usually located on the end of the motor, and is marked with labels indicating the different terminals. The most common terminals are the power terminals (L, N), the ground terminal (PE), and the control terminals (if applicable).
Step 3: Connect the Power Wires
The first step is to connect the power wires to the motor's terminal block. The power wires are usually colored black and white, or brown and blue, depending on the country and the electrical code. The black or brown wire is the live wire (L), and the white or blue wire is the neutral wire (N).
To connect the power wires, loosen the screws on the terminal block using a screwdriver. Insert the stripped ends of the power wires into the appropriate terminals, and tighten the screws to secure the wires in place. Make sure the wires are firmly connected, and there is no loose or exposed wiring.
Step 4: Connect the Ground Wire
The ground wire is an important safety feature that helps protect you from electrical shocks. It's usually colored green or green-yellow, and is connected to the ground terminal (PE) on the motor's terminal block.
To connect the ground wire, loosen the screw on the ground terminal using a screwdriver. Insert the stripped end of the ground wire into the terminal, and tighten the screw to secure the wire in place. Make sure the ground wire is firmly connected, and there is no loose or exposed wiring.
Step 5: Connect the Control Wires (if applicable)
If your motor has control terminals, you'll need to connect the control wires to the appropriate terminals. The control wires are used to control the operation of the motor, such as turning it on and off, reversing the direction of rotation, or adjusting the speed.
The control wires are usually colored differently from the power wires, and are marked with labels indicating their function. Refer to the motor's datasheet or user manual for the exact wiring diagram and instructions on how to connect the control wires.
Step 6: Insulate the Wiring Connections
Once you have connected all the wires to the motor's terminal block, you'll need to insulate the wiring connections to prevent short circuits. You can do this by wrapping electrical tape around the exposed wiring connections. Make sure the electrical tape is tightly wrapped, and there is no exposed wiring.
Step 7: Test the Motor
After you have completed the wiring connections and insulated them, you can test the motor to make sure it's working properly. Turn on the power to the circuit, and use a multimeter to test the voltage and continuity of the wiring connections. If everything is working properly, the motor should start running when you turn on the power.
If the motor doesn't start running, or if you notice any unusual noises or vibrations, there may be a problem with the wiring connections or the motor itself. In this case, you should turn off the power to the circuit immediately, and troubleshoot the issue before continuing.
Tips and Tricks
Here are some tips and tricks to help you connect your 45mm Standard Tubular Motor to a power supply safely and effectively:
- Read the Datasheet and User Manual: Before you start working on the motor, make sure you read the datasheet and user manual carefully. These documents contain important information about the motor's specifications, wiring diagram, and safety instructions.
- Use the Right Tools and Materials: Make sure you use the appropriate tools and materials for the job. Using the wrong tools or materials can damage the motor or cause electrical hazards.
- Follow the Electrical Code: Make sure you follow the electrical code in your area when connecting the motor to a power supply. This will help ensure that the wiring connections are safe and compliant with the local regulations.
- Test the Motor Before Installation: Before you install the motor in your application, make sure you test it to make sure it's working properly. This will help you avoid any issues or problems after the motor is installed.
- Seek Professional Help if Needed: If you're not comfortable working with electrical wiring or if you're unsure about any aspect of the connection process, it's always a good idea to seek professional help. A qualified electrician can help you connect the motor to a power supply safely and effectively.
Other Tubular Motor Options
In addition to the 45mm Standard Tubular Motor, we also offer a range of other tubular motor options to suit different needs and applications. Here are some of our popular products:
- 59mm Manual Tubular Motor: This motor is designed for applications where manual operation is required. It's easy to install and use, and is a great choice for small roller blinds and awnings.
- 45mm Resistance Rebound Tubular Motor: This motor is equipped with a resistance rebound mechanism, which helps prevent the motor from overheating and burning out. It's a great choice for applications where the motor needs to operate for long periods of time.
- 45mm Receiver-in Tubular Motor: This motor is designed for applications where remote control operation is required. It comes with a built-in receiver, which allows you to control the motor using a remote control.
Conclusion
Connecting a 45mm Standard Tubular Motor to a power supply is a relatively simple process, as long as you follow the right steps and use the appropriate tools and materials. By following the tips and tricks outlined in this blog post, you can ensure that the connection process is safe and effective, and that your motor operates smoothly and reliably.
If you have any questions or need further assistance with connecting your 45mm Standard Tubular Motor to a power supply, or if you're interested in learning more about our other tubular motor options, please don't hesitate to contact us. We're here to help you find the right motor for your application, and to provide you with the support and guidance you need to install and operate it successfully.
References
- Manufacturer's datasheet and user manual for the 45mm Standard Tubular Motor.
- Local electrical code and regulations.


