

Installing a tubular motor can seem like a daunting task, especially if you're not familiar with the process. As a tubular motor supplier, I've seen firsthand how a proper installation can make all the difference in the performance and longevity of the motor. In this blog post, I'll guide you through the step - by - step process of installing a tubular motor, ensuring that you can do it safely and effectively.
Step 1: Gather the Necessary Tools and Materials
Before you start the installation, it's crucial to have all the tools and materials you need at hand. Here's a list of what you'll typically require:
- Tubular motor: Depending on your needs, you can choose from a variety of options such as the 59mm Chain Tubular Motor, 45mm Receiver - in Tubular Motor, or 59mm Manual Tubular Motor.
- Screwdriver set: Both flat - head and Phillips - head screwdrivers will be needed to secure the motor and its components.
- Measuring tape: To ensure accurate placement of the motor and to measure the dimensions of the installation area.
- Level: This helps to ensure that the motor is installed perfectly horizontal or vertical, depending on the application.
- Mounting brackets: These are used to attach the motor to the structure. Make sure they are compatible with your tubular motor.
- Electrical wiring: Appropriate gauge electrical wires are required to connect the motor to the power source. You may also need wire connectors and electrical tape.
Step 2: Prepare the Installation Area
The first step in preparing the installation area is to measure the space where the tubular motor will be installed. Use a measuring tape to determine the length, width, and height of the area. Ensure that there is enough clearance around the motor for proper ventilation and operation.
Next, clean the installation surface. Remove any dust, debris, or grease that could interfere with the mounting process. If the surface is uneven, you may need to use shims to level it.
Step 3: Mount the Motor Brackets
Once the installation area is prepared, it's time to mount the motor brackets. Start by positioning the brackets at the desired location on the installation surface. Use a level to ensure that the brackets are perfectly horizontal or vertical.
Mark the screw holes on the surface using a pencil. Then, drill pilot holes at the marked locations. Be careful not to drill too deep, as this could damage the structure behind the surface.
Insert the screws through the holes in the brackets and into the pilot holes. Tighten the screws securely using a screwdriver. Make sure the brackets are firmly attached to the surface.
Step 4: Install the Tubular Motor
Carefully lift the tubular motor and place it onto the mounting brackets. Align the holes in the motor with the holes in the brackets. Insert the screws through the holes and tighten them using a screwdriver.
Check the alignment of the motor again using a level. If necessary, adjust the position of the motor until it is perfectly aligned.
Step 5: Connect the Electrical Wiring
Connecting the electrical wiring is a critical step in the installation process. Before you start, make sure the power source is turned off to avoid any electrical shocks.
First, identify the power supply wires. Usually, there will be a live wire (usually brown or red), a neutral wire (usually blue), and an earth wire (usually green or yellow).
Connect the live wire from the power source to the corresponding terminal on the motor. Use a wire connector to secure the connection and wrap it with electrical tape for added safety.
Repeat the process for the neutral and earth wires. Double - check all the connections to ensure they are secure.
Step 6: Test the Motor
After connecting the electrical wiring, turn on the power source. Test the motor by operating the control switch. If the motor doesn't start, check the electrical connections again to make sure they are correct.

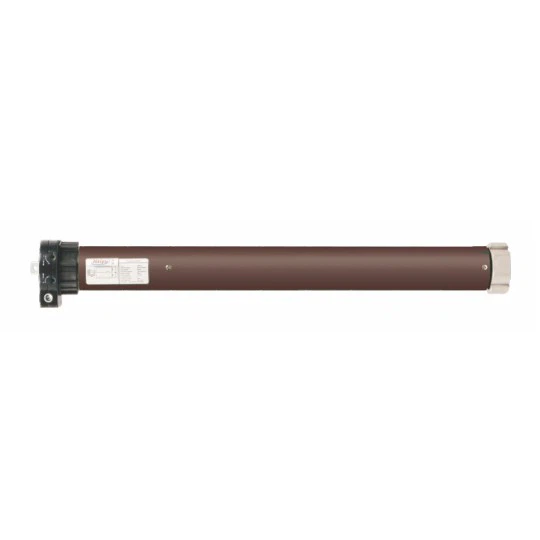
If the motor starts but makes unusual noises or doesn't operate smoothly, there may be an issue with the installation. Check the alignment of the motor and the mounting brackets. Make sure the motor is not overloaded.
Step 7: Adjust the Limit Switches
Most tubular motors come with limit switches that control the maximum and minimum travel of the motor. These switches need to be adjusted according to your specific requirements.
To adjust the limit switches, refer to the motor's user manual. Usually, you'll need to operate the motor and use a screwdriver to adjust the position of the limit switch cams.
Step 8: Final Checks
Once the motor is installed and tested, perform a final check. Make sure all the screws are tightened, the electrical connections are secure, and the limit switches are adjusted correctly.
Check for any signs of damage or wear on the motor and its components. If you notice any issues, address them immediately.
Safety Precautions
- Always turn off the power source before working on the electrical connections.
- Wear appropriate safety gear, such as gloves and safety glasses, when handling the motor and tools.
- Follow the manufacturer's instructions carefully throughout the installation process.
- If you're not confident in your electrical or mechanical skills, it's advisable to hire a professional electrician or technician to install the tubular motor.
Conclusion
Installing a tubular motor may seem complex, but by following these steps and taking the necessary safety precautions, you can complete the installation successfully. As a tubular motor supplier, I'm committed to providing high - quality products and support to our customers.
If you're interested in purchasing a tubular motor or have any questions about the installation process, please feel free to contact us. We're here to assist you with all your tubular motor needs and can provide you with more detailed guidance and product information to ensure you make the right choice for your application.
References
- Tubular Motor Installation Manuals provided by the manufacturer.
- Electrical Safety Guidelines from relevant industry standards.


